Label Control:
Currently the form does not contain any indication about what should be entered in the textbox. For such a purpose, Label control is used and the process of adding it is same. As in other controls studied so far “Text” property here is also used for indicating what should be displayed in the Label
String constant:
When you observe the above codes regarding message box you will identify that when displaying a predetermined set of characters (also known as String) in the message box, we used double quotes (“”). However when we wanted the contents of textbox which obviously depends upon the input of the user, we didn’t use the double quotes. Actually when any thing is written outside double quote it is considered to be something that the compiler/runtime should evaluate however things that are written in double quotes are considered as string constants
Variables:
Variables are place holders that can hold data values. For example age can be stored in a variable for further processing. Similarly Text property of TextBox is also a variable as it stores string values that are typed in the textbox.
Since C# is a strictly typed language therefore you must identify the data-type (e.g, integer, decimal, etc) while creating a variable. The process of creating a variable is known as declaration. Following is an example of declaring and integer variable. The example also includes statement to store a value in the declared variable which is known as assignment. When the variable is assigned a value first time, it is known as initialization.
The above statements can be combined into a single one which is indicated as follows
Variables are also created in classes but when created in classes they are known as properties. For example Microsoft created a variable named Text in class Label which is termed as property of label.
INFORMATION ABOUT COMPUTER SCIENCE(SOFTWARE ENGI)TECHNOLOGY & MEDICAL SCIENCE
Thursday, January 7, 2010
INTRO ABOUT IDE • Visual Studio • Solution Explorer • ToolBox IN . NET PROGRAMMING
IDE
An Integrated Development Environment (IDE) brings all of the programmers tools into one convenient place. There was a time when programmers had to edit files, save the files out, run the compiler, then the linker, build the application then run it through a debugger.
Today's IDEs bring editor, compiler, linker and debugger into one place along with project management tools to increase programmer productivity.
Visual Studio
Visual Studio is an IDE for building ASP.NET Web applications, XML Web Services, desktop applications, and mobile applications. Visual Basic, Visual C++, Visual C#, and Visual J# all use the same integrated development environment (IDE), which allows them to share tools and facilitates in the creation of mixed-language solutions
For creating new projects navigate to the menu indicated in the following figure 2.1
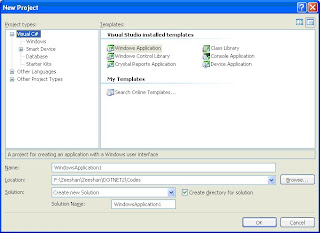
After clicking the above menu button following screen will be displayed from which you will have to select the project type and language. The figure 2.2 shows selection of “windows application” using C# language. After choosing the appropriate template i.e. “Windows Application” give a name to the project and specify a location on which you want the application to be stored.
Once you create the application a screen similar to the following will be created.
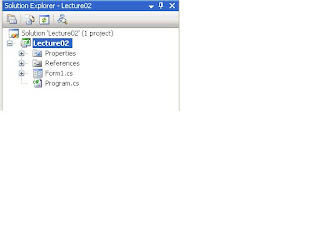
As can be observed that the IDE consists of a number of menus and windows. Let’s see the purpose of each window that can be seen on the screen. On the top left is the solution explorer. Figure 2.4 focuses on solution explorer only.
Solution Explorer allows you to view items and perform item management tasks in a solution or a project. It also allows you to use the Visual Studio editors to work on files outside the context of a solution or project. A single solution and its projects appear in a hierarchical display of solution explorer that provides updated information about the status of your solution, projects, and items. This allows you to work on several projects at the same time. Because the selected project and item determines the toolbar icons, this list is a partial representation of those you might encounter while working in Solution Explorer.
Properties
Displays the appropriate property user interface for the selected item in the tree view.
Show All Files
Shows all project items, including those that have been excluded and those that are normally hidden.
Refresh
Refreshes the state of the items in the selected project or solution.
View Class Diagram
Launches Class Designer to display a diagram of the classes in the current project. For more information, see Designing Classes and Types.
View Code
Opens the selected file for editing in the Code Editor.
View Designer
Opens the selected file for editing in the designer mode of the Code Editor.
Add New Solution Folder
Adds a Solution Folder to the selected item. You can add a Solution Folder to the solution or to an existing Solution Folder.
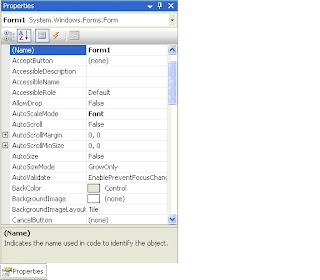
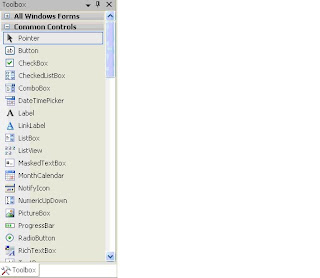
Apart from solution explores you can also see a properties window and a toolbox shown in the figure that are following.
The details of the above mentioned windows will be discussed later.
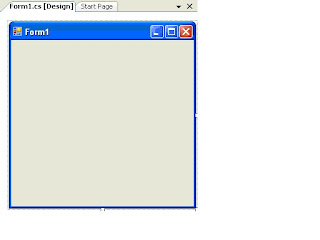
In figure 2.3 you must have observed the following at the center. This is the designer of form.
Subscribe to:
Comments (Atom)